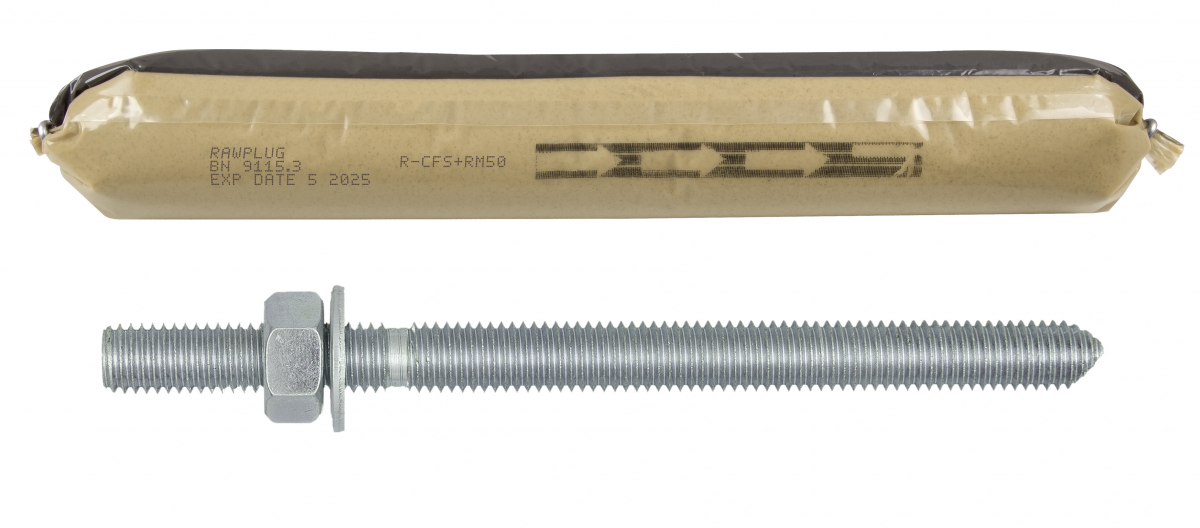
RM50 with Threaded Rods for Concrete (CFS+)
Universal polyester (styrene free) resin - European Approval for 15 substrates - Cartridge Free System (CFS+)


Features and benefits
- Approved for use in cracked and non-cracked concrete (EAD 330499-01-0601), working life up to 100 years
- The most contemporary general use bonded anchor
- Quick, secure and simple installation
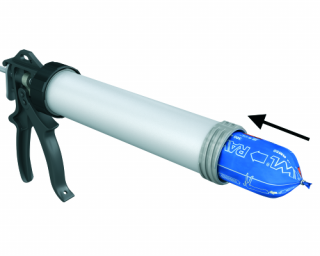
- Unique soft foil pack for less waste
- Effortless extrusion due to the patented self-opening system with manual or battery dispenser guns
- Product with wide spectrum of use in the medium load capacity area
- Ideal for applications where mechanical anchors are not suitable
- Suitable for multiple use. Partly used product can be reused after fitting new nozzle
Product information
Product Code |
Resin |
Description / Resin Type |
Volume |
[ml] | |||
R-CFS+RM50-4 |
RM50 |
Styrene Free Polyester Resin |
300 |
R-CFS+RM50-600-8 |
RM50 |
Styrene Free Polyester Resin |
600 |
R-CFS+RM50-600-W |
RM50 |
Styrene Free Polyester Resin |
600 |
Base material
-

Non-cracked concrete C20/25-C50/60
For use also with
-
Natural Stone (after site testing)
Applications
- Balustrading
- Handrails
- Canopies
- Curtain walling
Installation guide
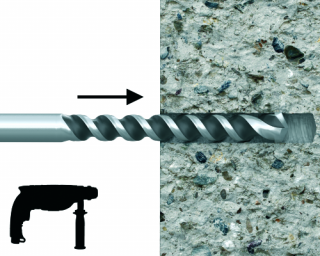


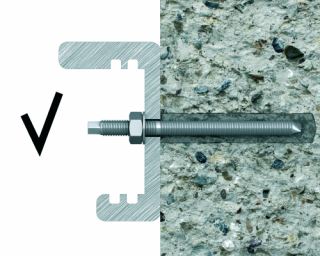
- Drill hole to the required diameter and depth for stud size being used.
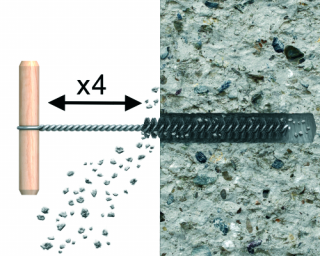
- Clean the drill hole thoroughly with brush and hand pump at least four times before installation.
- Insert foil into gun and attach nozzle.
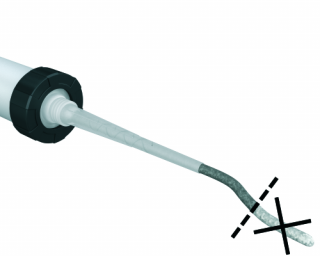
- Dispense to waste until even colour is obtained.
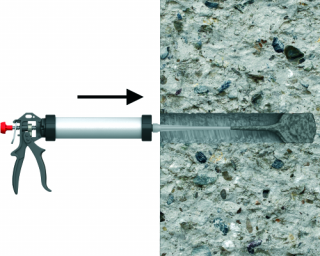
- Insert the mixer nozzle to the bottom of the drill hole and inject resin, slowly withdrawing the nozzle as the hole is filled to 70% of its depth.
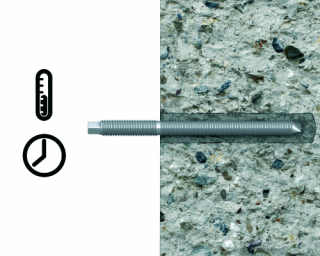
- Immediately insert the stud, slowly and with slight twisting motion. Remove any excess resin around the hole before it sets and leave it undisturbed until the curing time elapses.
- Attach fixture and tighten the nut to the required torque.
Installation data
R-STUDS
Size |
M8 |
M10 |
M12 |
M16 |
M20 |
M24 |
M30 |
||
Thread diameter |
d |
[mm] |
8 |
10 |
12 |
16 |
20 |
24 |
30 |
Hole diameter in substrate |
d0 |
[mm] |
10 |
12 |
14 |
18 |
24 |
28 |
35 |
Hole diameter in fixture |
df |
[mm] |
9 |
12 |
14 |
18 |
22 |
26 |
33 |
Min. hole depth in substrate |
h0 |
[mm] |
hnom + 5 |
hnom + 5 |
hnom + 5 |
hnom + 5 |
hnom + 5 |
hnom + 5 |
hnom + 5 |
Min. substrate thickness |
hmin |
[mm] |
hnom + 30 ≥ 100 |
hnom + 30 ≥ 100 |
hnom + 30 ≥ 100 |
hnom + 2d0 |
hnom + 2d0 |
hnom + 2d0 |
hnom + 2d0 |
Installation torque |
Tinst |
[Nm] |
10 |
20 |
40 |
80 |
120 |
180 |
300 |
Min. spacing |
smin |
[mm] |
40 |
40 |
40 |
50 |
60 |
70 |
85 |
Min. edge distance |
cmin |
[mm] |
40 |
40 |
40 |
50 |
60 |
70 |
85 |
MINIMUM EMBEDMENT DEPTH | |||||||||
Min. installation depth |
hnom,min |
[mm] |
60 |
70 |
80 |
100 |
120 |
140 |
165 |
MAXIMUM EMBEDMENT DEPTH | |||||||||
Min. installation depth |
hnom, max |
[mm] |
160 |
200 |
240 |
320 |
400 |
480 |
600 |
Minimum working and curing time
RM50
Resin temperature |
Concrete temperature |
Curing time* |
Working time |
[°C] |
[°C] |
[min] |
[min] |
5 |
-20 |
- |
- |
5 |
-15 |
- |
- |
5 |
-10 |
- |
- |
5 |
-5 |
480 |
70 |
5 |
0 |
240 |
45 |
5 |
5 |
120 |
25 |
10 |
10 |
90 |
15 |
15 |
15 |
60 |
9 |
20 |
20 |
45 |
5 |
25 |
30 |
30 |
2 |
25 |
40 |
- |
- |
*For wet concrete the curing time must be doubled
RM50-S
Resin temperature |
Concrete temperature |
Curing time* |
Working time |
[°C] |
[°C] |
[min] |
[min] |
5 |
-20 |
- |
- |
5 |
-15 |
- |
- |
5 |
-10 |
- |
- |
5 |
-5 |
24 h |
180 |
5 |
0 |
18 h |
120 |
5 |
5 |
12 h |
60 |
10 |
10 |
8 h |
45 |
15 |
15 |
6 h |
25 |
20 |
20 |
4 h |
15 |
25 |
30 |
1.5 h |
7 |
25 |
35 |
1 h |
6 |
25 |
40 |
45 |
5 |
*For wet concrete the curing time must be doubled
RM50-W
Resin temperature |
Concrete temperature |
Curing time* |
Working time |
[°C] |
[°C] |
[min] |
[min] |
5 |
-20 |
24 h |
45 |
5 |
-15 |
18 h |
30 |
5 |
-10 |
8 h |
20 |
5 |
-5 |
5 h |
11 |
5 |
0 |
2 h |
7 |
5 |
5 |
1 h |
5 |
10 |
10 |
45 |
2 |
15 |
15 |
30 |
1.5 |
20 |
20 |
15 |
1 |
25 |
30 |
- |
- |
25 |
35 |
- |
- |
25 |
40 |
- |
- |
*For wet concrete the curing time must be doubled