RPP-MORTAR Polyurethane Mortar
Polyurethane Thin Bed Mortar
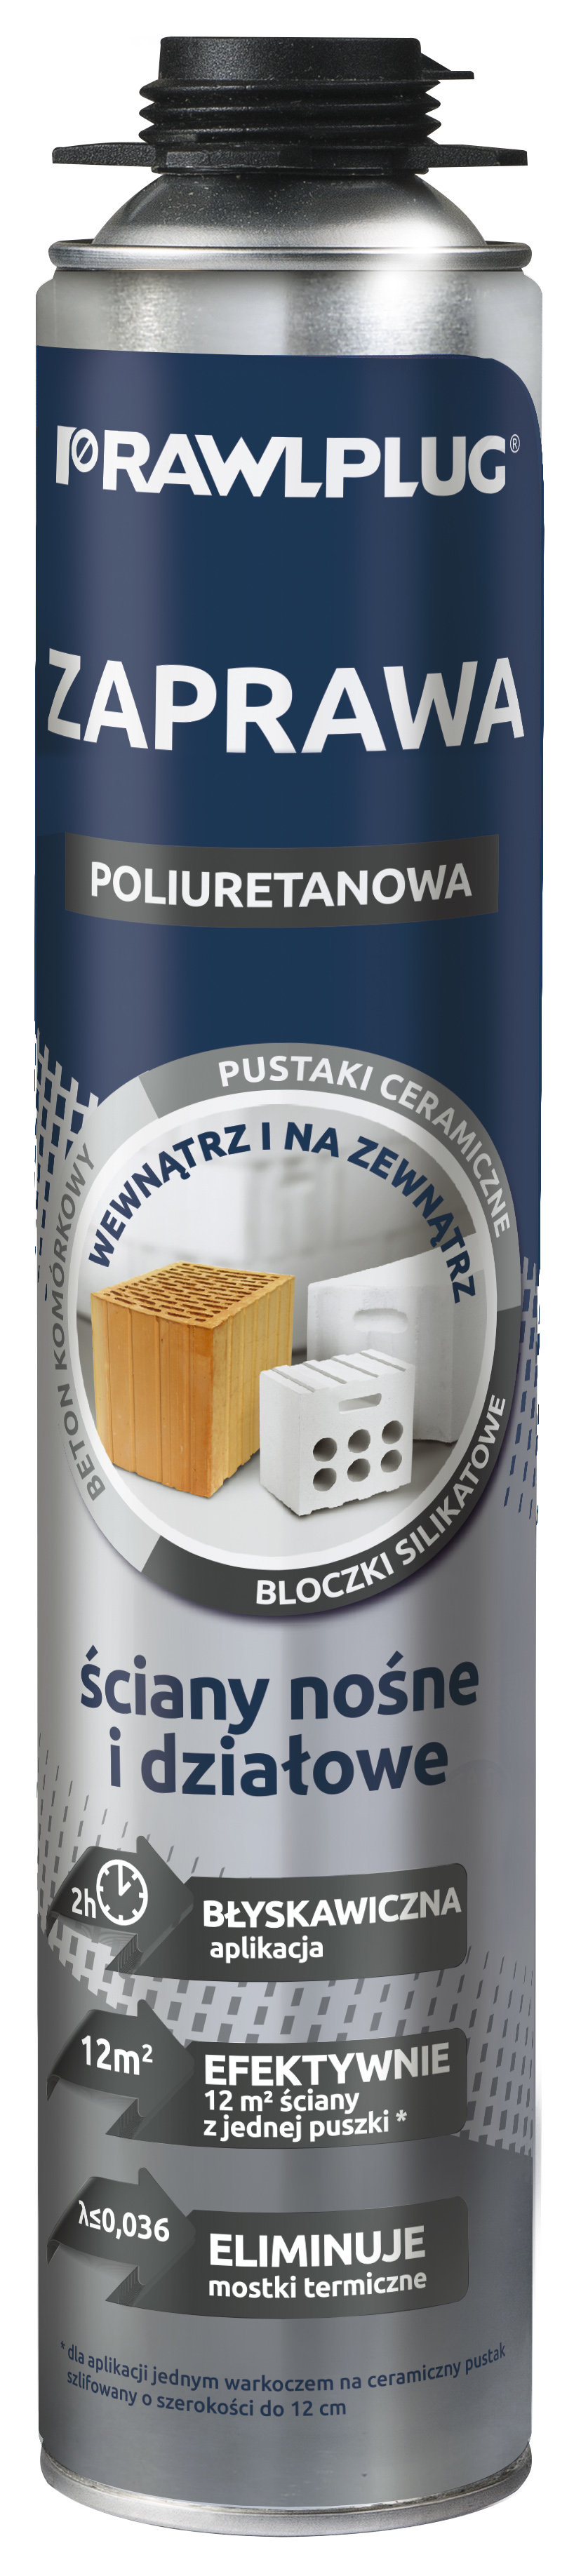

Features and benefits
- Energy efficiency - reduction of heat escape by thermal bridges (λ ≤0,036)
- Durability - high mechanical properties, elasticity, bonding strength
- Effective yield - up to 12 square meters wall from one can
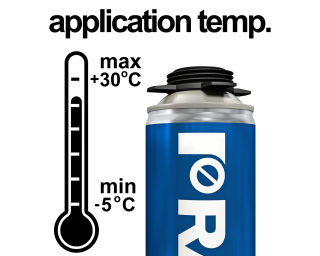
- Extended construction season - application temperature up to -5C
- Savings of money & time - quicker building works, less tools & materials
- Easy & clean work - product ready to apply, no wastes, no dust, without lifting weights
Base material
-
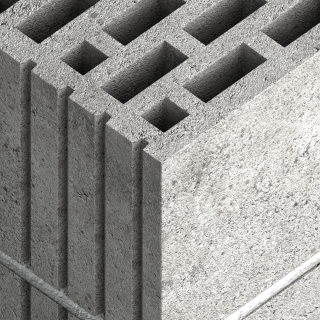
Aerated Concrete in TLMB dimensional tolerance class
-
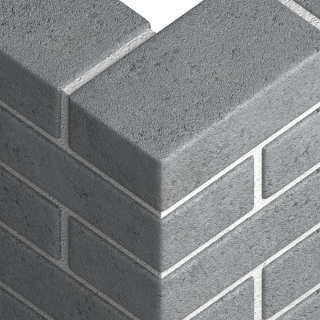
Ceramic Hollow Blocks in high dimensional tolerance class TLMB
-
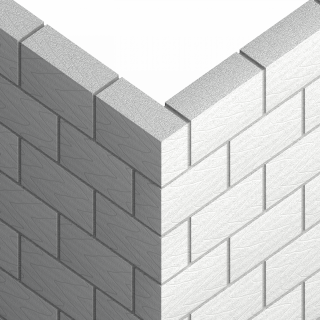
Silicate Blocks in high dimensional tolerance class TLMB
For use also with
-
.png)
Aerated Concrete Block
-

Concrete
-
Masonry
Applications
- Ideal for detached houses, semi-detached houses & industrial buildings
- Suitable for building internal and external walls
- Dedicated both for load-bearing walls and partition walls
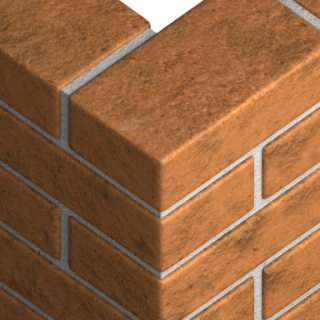
- Suitable for blocks in TLMB dimensional class made from autoclaved aerated cellular concrete, ceramic hollow and silicate blocks, with appropriate solutions for this type of high dimensional tolerances
Installation guide
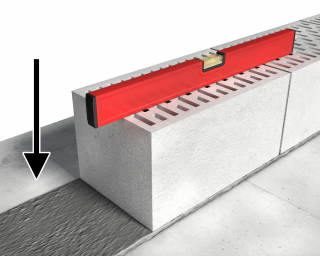
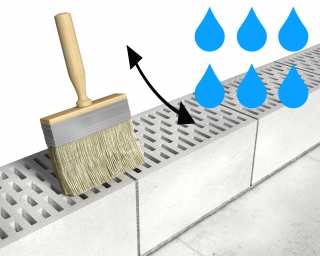

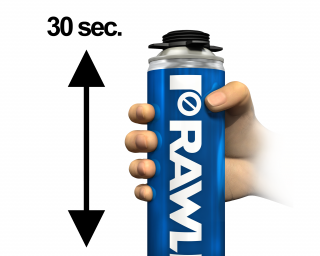
- The first layer of the wall must be raised with the use of traditional mortar to accurately leveling the surface. Wear protective gloves. The working surfaces must be free of dust, debris and other materials that would impair the bond strength. Moisten the working surface with water, using a brush or spray. Shake can vigorously (30 sec).
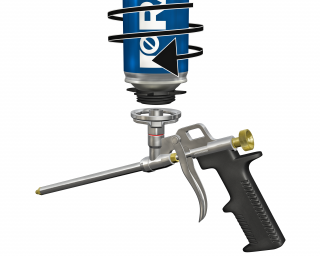
- Optimal can temperature is +20°C. Application temperature from -5°C up to +30°C. Attach applicator gun and hold can upside-down during application.
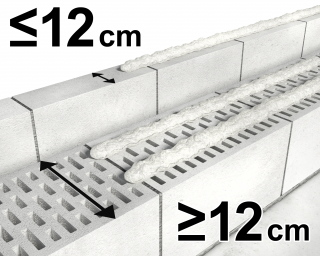
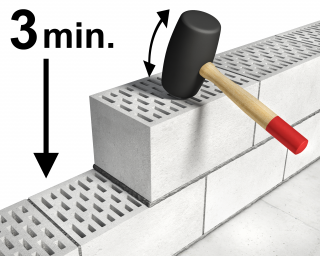
- Apply the mortar with one bead in the middle of the block with a width of 12 cm or two parallel beads for blocks with a width exceeding 12 cm. Apply the mortar on the long side of the block keeping 3 cm distance from the side edge of the block forming bead with required diameter 3 cm for aerated concrete blocks or bead with required diameter 5 cm for hollow ceramic and silicate blocks. Blocks should be put on applied mortar up to 3 min after mortar application. Layed block should be pressed slightly in order to obtain thin slit evenly spread on the block surface. To achieve the desired accuracy position of the blocks should be leveled. Blocks can be horizontally corrected within 3 minutes by up to 0,5 cm without detaching them from the wall. Stabilize the blocks with a rubber hammer.
- Blocks cannot be removed from the wall. In case taking off the block required applying new lines of mortar. To eliminate thermal bridges and increase walls durability and resistance, mortar should be applied also on vertical surfaces of the blocks, in corners and connection between partition walls.
- In the event of a stoppage exceeding five minutes duration, wipe the nozzle with cleaner for foam applicator. After removing the applicator gun from the can, wipe down the nozzle and gun (internal and external surfaces) using a cleaner.